 |
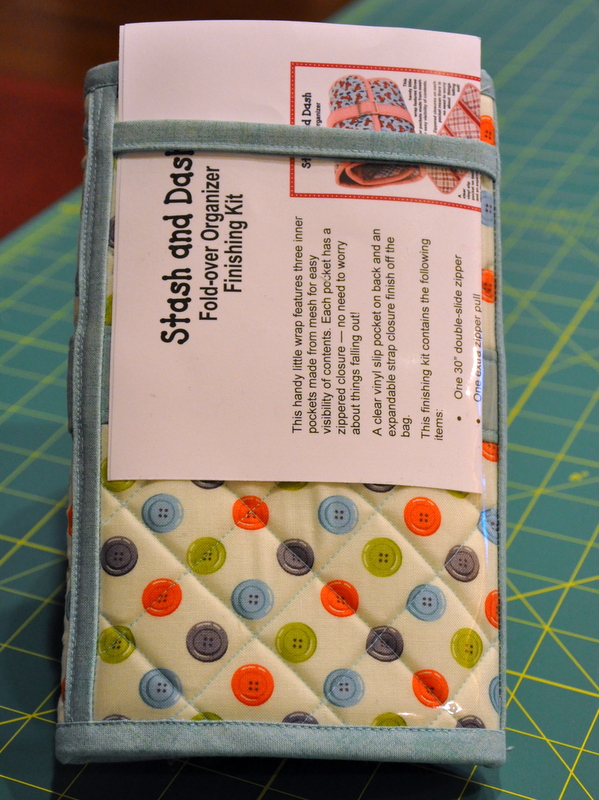
| Stash and Dash Organizer - 8" X 5" when closed, as pictured. |
2017 is the year for getting organized at
my LQS; they launched something new, a "Let's Get Organized" club featuring a pattern each month from
patterns by Annie. The shop will highlight twelve different bags and/or organizers to make quilters' (or anyones') lives easier and more orderly...not to mention
CUTER! This is last month's pattern: "Stash and Dash". The hardest part, for me, was choosing the fabric to use! I will make more of these, it is a great pattern with a wonderful finished product, but I will choose a busier fabric for the contrasting binding. Live and learn. This one worked out perfectly fine, but there's always room for improvement; since one is attaching binding and sewing through the layers, front to back, I did find that using an almost-solid did nothing to hide stitches that didn't align perfectly on top of one another. This isn't really a big deal, but I did make a mental note for next time (I am already planning my next one!). The first step was quilting the main body fabric and lining, using
Soft and Stable inside, it made a wonderfully stable foundation and was easy to quilt through, I loved the process and was happy with the cross-hatching.
The inside of the Stash and Dash has three roomy, zippered, mesh pockets; perfect for filling with any treasures you want to grab, stow securely and take along. Who couldn't use one (or two) of these?
The pattern has easy-to-follow instructions for binding and zipper insertion, I felt like a pro with these results! The nice thing about the mesh pockets is that they are stretchy and can be over-filled as necessary, the sliding strap on the outside will adjust to accommodate whatever is contained inside.
The back of the Stash and Dash has a vinyl see-through pocket for including any necessary, accessible items you might need without opening or unrolling the organizer.
I couldn't wait to share this cute project with you. I highly recommend the pattern (the tips and techniques are terrific!) and feel more organized already, WOW; by the end of this year my organizational skills will should be epic. 😉
Life is Good!


7 comments:
That turned out really cute. So professional. I like the mesh - when I have lots of pockets I have trouble remembering what I put in each of the pockets.
Very nice finish! Looks to be really useful for small hand stitching projects, or the small things you need to take to retreats and sit-n-sews that tend to get lost in big bags. I do like that you can see the contents--you don't have to open everything to find what you want!
I will watch your bag making with interest. I seem to have built up an aversion to attempting to make bags (or anything other than quilts, for that matter), so after seeing some of your cute creations, maybe I will finally be inspired to try.
I've seen this pattern at a few stores but never bought it -- now I definitely need to pick it up. Love this! Thanks for the tips on the binding too. The mesh pockets are a great idea.
This is a super project and so well done.
that is sooo darn cute and handy....love it!
Great organizer! Those zippers scare me even thinking about them though I know if I put my mind to it I can install zippers. I don't think I've ever seen mesh sold in Japan.
Another Great post. i am amazed to see how you can handle and produce these small hand stitching projects with so much accuracy. the finished product is so fantastic and stunning. I am inspired with this handbag work.
Post a Comment