
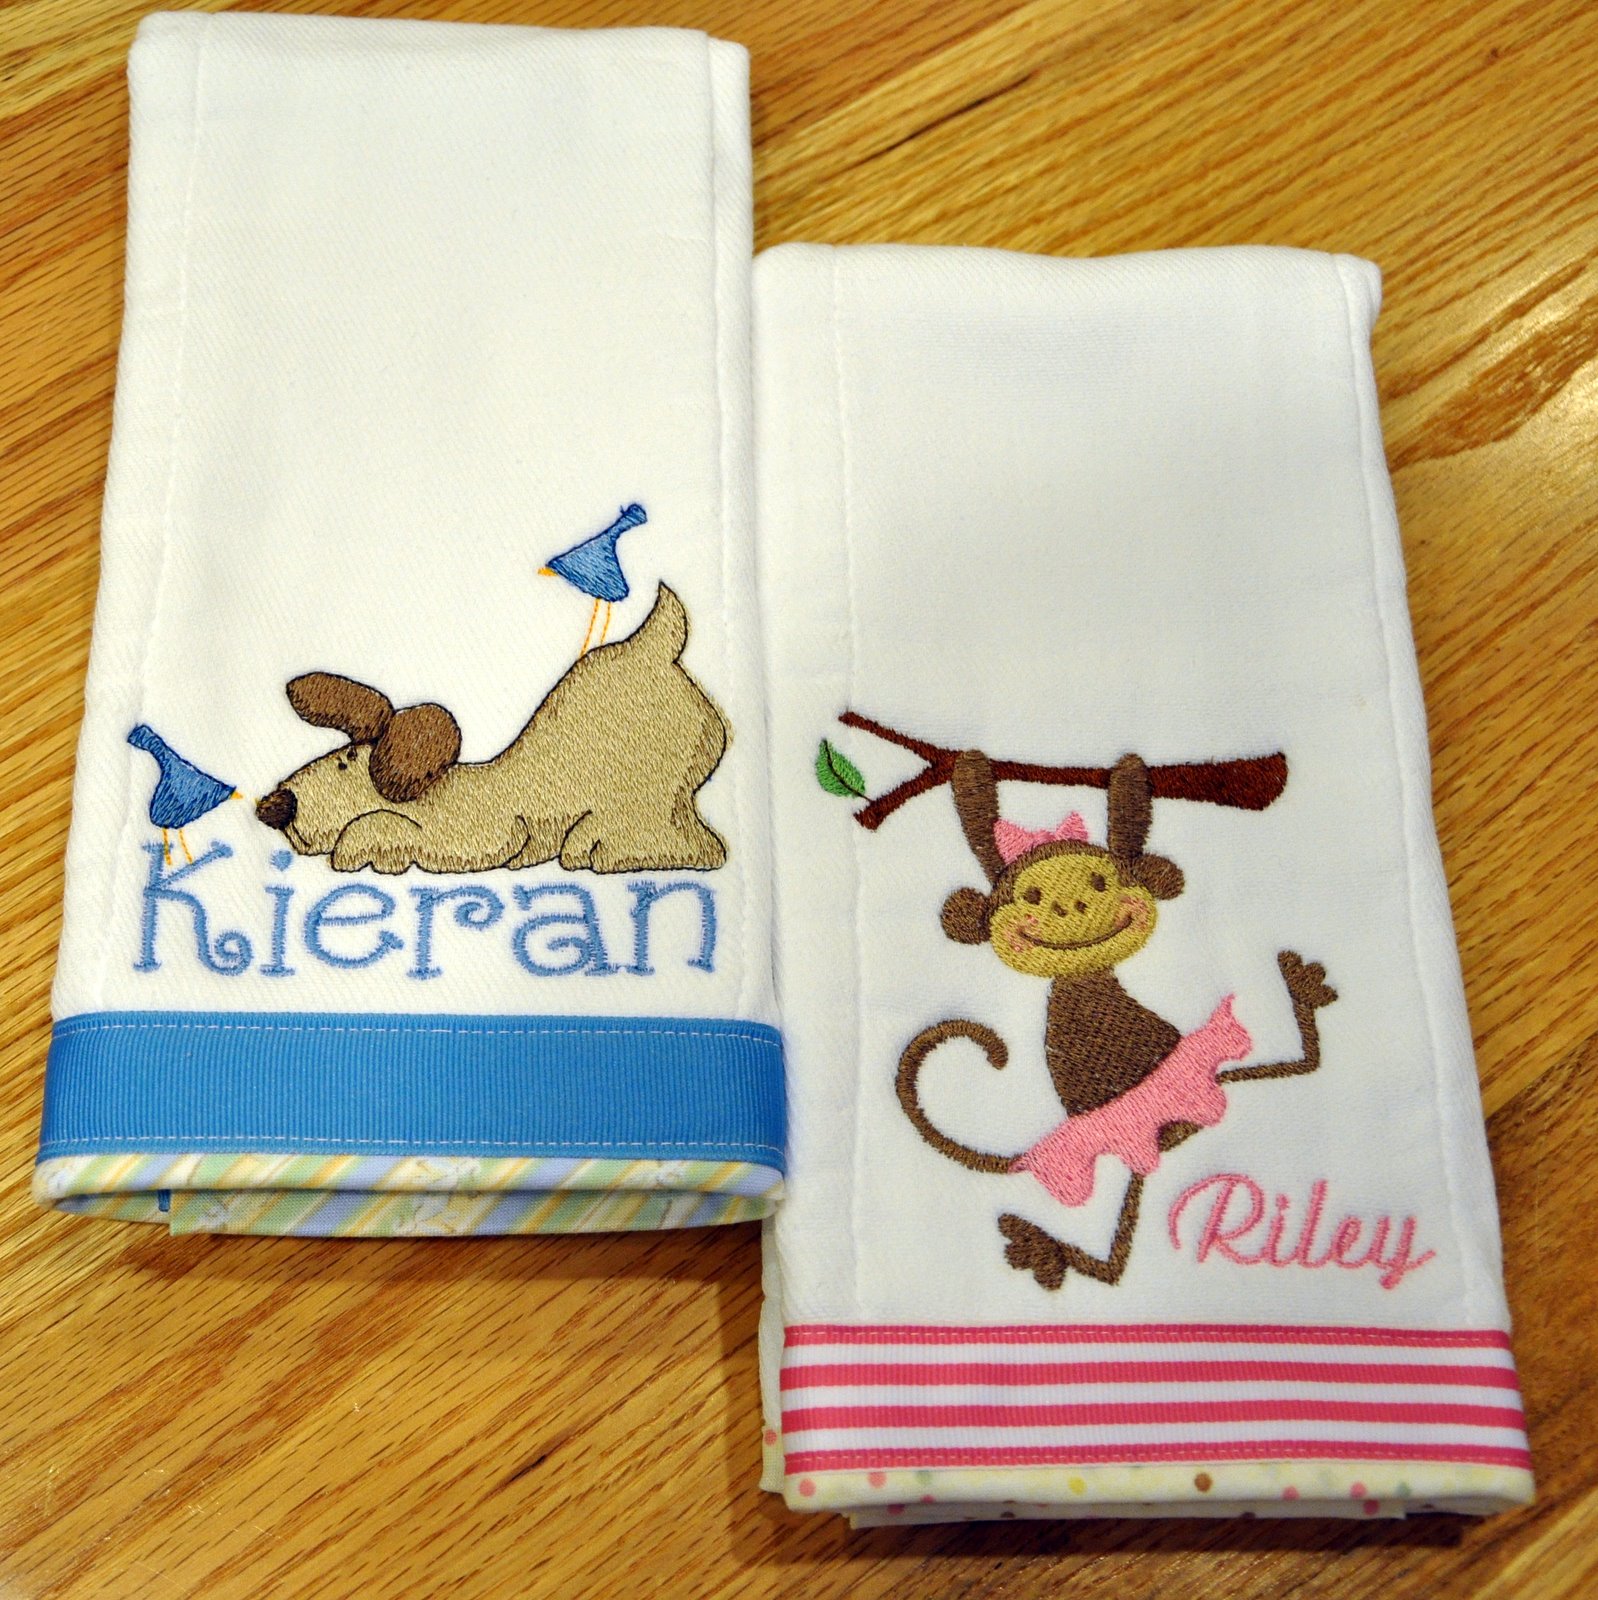
 Yesterday, Wednesday, was once again a devoted machine embroidery day at Chez Goodneedle! There have been some inquiries into how the burp cloths I crank out are created. I have included extra photos, below, to give you more details on the front and back. I start the whole process with Gerber 6-ply, pre-folded, premium diapers. I pre-wash and press them flat before beginning the embellishment. My primary objection to using them without binding is the raggedy edge that becomes more pronounced after a trip through the washer. That would only get worse the more they are washed and dried, (with these items launder-ability is key!) however, once they're trimmed up they're good to go wash after wash! I place the design onto the diaper so that the base of the embroidery field is at least 1.25" from the bottom edge to accommodate the ribbon trim. Once the embroidery design is completed I cut two strips of coordinating binding fabric, on the bias, 15" X 2". (The diapers measure 13" across the short edges, 15" allows the necessary one inch "tuck under" allowance on either side.) I attach this strip, on both the top and the bottom of the burp cloth with a 1/4" seam. Then, a trip to the ironing board where the strips are pressed away from the burp cloth and the opposite strip edge is folded and pressed under 1/4". The strip ends get tucked in, even with the diaper edges at this point, and pressed likewise. Then, the ribbon (I use grosgrain ribbon, 7/8" wide) is applied across the face of the burp cloth and carefully pinned so that when it is top stitched in place it will secure the folded edge of the binding on the back side. I tuck the ribbon ends in and under the binding on the sides at this point and press flat. (Check pin placement carefully to make sure you're on the ribbon edge- front, and folded strip edge- back.) Stitch the ribbon in place, backstitching at the ends, remove from the machine and trim the threads. Voilà; you're done! Toss the completed burp cloth over your shoulder, add baby, pat gently!
Life is Good!
Be Happy Tip #5:
Get a move on - Being physically active makes you happy. Find some activity you like to do and notice how it changes your mood: any kind of sport, dance and yoga. Make a habit of being active in any way you feel like.
Get a move on - Being physically active makes you happy. Find some activity you like to do and notice how it changes your mood: any kind of sport, dance and yoga. Make a habit of being active in any way you feel like.


