Showing posts with label pattern. Show all posts

03 August, 2020

The Quiet Road

There's a kind of quiet the descends on the house after children leave; it's a weird stillness that settles around you like a blanket, one that's impossible to shake off. You're aware of the hush all over again each time you pick up a forgotten Lego, book or sock from its resting place left in their wake. It's the same every time, sweet memories of time shared together filling up the empty spots and spaces that only days before were filled with activity and punctuated with laughter, jokes, music and hugs. Today is one of those days. I completed a quilt top last week, a Yellow Brick Road pattern made up of low-volume prints with an autumn theme. I'm calling this one "The Quiet Road". Sometimes a super-easy pieced quilt top is just the thing to satisfy that need to sew and desire to accomplish more than weeding the flower bed or vacuuming the house, those things that become all-too-soon undone. Sure, I've already got a sizable queue of quilts-to-be-quilted in the closet but this was begging to be completed, it was jumping up and down with its hand raised shouting whispering loudly "pick me, pick me" from the stack of UFO's. I'm pleased to have listened ; the result is vintage-y in appearance and calming by nature.
"The Quiet Road" ~ 57" X 75"

I've chosen a dark orange for the backing and a meandering pumpkin pantograph for the quilting, in burnt orange thread. Isn't it ironic how sometimes it's the quiet things that should, seemingly, fade into the background and remain unnoticed; but, instead, they grab all of your attention and move themselves forward? 
That's the way today is~ it's the silence that's wrapped itself around me. 
It's a peace that has filled my heart providing energy for planning that next noisy adventure;
sometimes we need only take a stroll down a quiet road to show us where and what we require!
πŸ’—
Life is Good!

16 June, 2020

All American

All American ~ 60" X 60"

I didn't quite succeed in getting this patriotic quilt top pieced by Flag Day this year, but almost! I saw this pattern a few months ago online and knew that this was the quilt that I wanted to make as a wallhanging for brick wall out on the new porch, it will hang over the drop-leaf game table that Mr. Goodneedle is building-- the colors are perfect and I believe that the visual impact of this design is reminiscent of a game board. I did something that I hardly ever do: I ordered the kit from Simple Stitches; everything about the fabrics, colors and design appealed to me. The customer service was great, receiving the fabrics and pattern in a matter of only a few days! I modified the pattern for my space by only constructing five rows instead of six and omitting the outer border entirely.
This was an easy pattern, the blocks are all 12" and the piecing was straight forward. I didn't use the cutting instructions as directed: in fact, I never even opened the pattern at all. I used my Studio 180 tools: the Tucker Trimmer for the blocks above and the Wing Clipper for the large star blocks. 
It's easy to be accurate when joining the blocks using these tools, as everything is just a smidgen over-sized and the trim down results in perfectly square units every time. 
Once the blocks were all laid out I "webbed" the entire quilt top together vertically and then stitched the horizontal rows together; this is a time saving technique for me. 
Here's a snapshot of the cutting table with the paper pattern (link is above, under the top photo). If anyone reading this post would like the pattern, please let me know. Its brand new and I'd be more than happy to send it to you (USA). If more than one person would like it, I'll simply draw a number. Now, I just need to get this new top loaded and quilted; as things stand right now I have two quilts in line ahead of this one.

Adapting in an upside-down πŸ™ƒworld: because we can't visit my Mom and Dad in person right now we've taken to Face Timing. Our normal early morning phone calls are now video experiences. I'm extremely grateful to my brother-in-law who facilitated the I-pad set up so that this could happen. Originally we had planned to set-up this gift for Dad in person, when we went to their home back in March. That trip never happened. Finally, it became apparent that we wouldn't be traveling (and exposing them to heaven-knows-what we might encounter between here and there) for the foreseeable future, but the need to see each other was still great. So, we sent it off in a package!
This is a screen shot of our phone visit this morning; I couldn't be happier, he was willing and eager to learn and use technology. We hope to get up to New England to see them by late summer or early fall. Fingers crossed. 
"Most folks are about as happy as they make up their minds to be" - Abraham Lincoln

What's making you happy today? 
I have switched off the TV and am listening to my favorite playlist of oldies while I sew.πŸ™‚πŸŽ΅  
Next up on my cutting table: more face masks, assembly-line style. 

Life is Good!

16 April, 2020

YAGOF

YAGOF = You're A Grand Old Flag! Yep, the Flag-A-Day project has progressed into YAGOF. This flimsy is made from the "Stars and Stripes" Thimble Blossoms pattern by Camille Roskelley, it measures 56" X 71". 
I used a mushroomy beige/gray setting fabric; this quilt will be used on our new screened in porch this summer, it will live on the back of the sofa out there for comfort on chilly nights or early mornings.  
I'm eager to quilt this one up. I have a custom quilt on the rails right now, this will be up next!
As I pieced YAGOF another tumbler quilt grew beneath the needle, leader-ender style. At this rate, I'll have a stack of these quilts to donate come fall. 
This is the magic scrap basket which sits at the base of my Accuquilt cutting table. It's a "loaves and fishes" basket, it never empties but continues to provide-- with leftovers! I feed it with pieces too small to reshelve: anything smaller than 12" X 18" inches. There seems to be a constant supply, and SEW it goes...
Life is Good!

Up next: Chain Reaction

24 March, 2020

Gotcha Covered

Just like everyone else in world, I am sewing masks; so much has changed in the past week. A friend told me that this is the WW2 equivalent of rolling bandages for the war effort, we're all fighting a vastly different type of war this time. I stitched masks until I ran out of elastic and then took to sewing fabric ties. The pattern that I used was this one, distributed by my LQS at the request of one of the employees, her husband is a Pulmonologist at a local hospital in desperate need, where these masks will be delivered*.  I've been finishing up and doing other things too while staying at home (are these the days for which we've been stockpiling supplies and fabric?) and hope to start posting some cheer-filled, short posts on a daily basis beginning tomorrow. Please stay safe, be healthy and wash your hands. 🧼
Life is Good!

Up next: Berry Good

* Disclaimer: As Annie so perfectly advises in the comment below, : "they have limitations as a viral barrier. Medical personnel know this, but if you’re giving them to untrained people, make sure you let the wearer know they won’t offer the protection they get from commercial ones (which are unavailable)". As far as I understand  it, the recipients of these homemade masks plan to use them in combination with other viral barriers in the hospital setting.

10 April, 2019

What's Under Foot?

What's under foot at your house?  There's something colorful, soft and scrappy at mine! I have always wanted to make a Jelly Roll rug. I have all the components, I just haven't actually gotten around to making one yet. Something about cutting ten miles of batting into 2.5" strips has been enough of a deterrent toward progress on that front that it has stopped me in my tracks. Then, someone smart and enterprising began marketing the jelly roll rug batting pre-cut. Brilliant!! But, I am far too practical (read: cheap!) to NOT use ends and edges of batting piled high in my own closet to buy a roll! And, yes, A Jelly Roll rug is still on my agenda. But, in the meantime, I saw some Fuse, Fold and Stitch rugs earlier this year, they were made from pre-cut 10" squares (Layer Cakes). I caved. What can I say? I can be easily distracted.
I bought the pattern and a 25 yard roll of the fusible, pre-cut foam on the spot (my rationale: I DON'T happen to have any of that lying around!), I knew that I had a Layer Cake languishing on the shelf in my sewing closet. One rainy afternoon last week I laid out all the squares on the floor into rows in a random color pattern and labeled my rows. Then I began sewing and fusing. The foam is fully encased in each stitched row, on two sides, and then folded down the center for double cushioning. 
I kept my rows labeled, in order, as I moved through the process. 
Before joining the rows together they are stitched down the center. I used a walking foot and a Jeans needle (#100/16) and had no problems at all sewing through the extra thickness. 
The labeled rows after joining and trimming. I still need to add conventional binding all around.
Fuse, Fold and Stitch Rug ~ 25" X 38" 
This beauty will live in my laundry room, it is fully reversible too! Doesn't it brighten up the space? Even the most mundane of all chores is now a colorful and cheery experience. And, that Jelly Roll rug? Yes, it's still on the back burner. Now that I have this one done it has spurred me on. I WILL cut the batting for it! It will live in the laundry room, too, in front of the washer and dryer, a companion rug for this little cutie!

Life is Good!

01 June, 2017

Twirl, Girl, Twirl!

I was challenged to figure out what to do with that leftover pom-pom trim from the Big Hex. I had an idea! Remembering this book on my shelf:


...and a particular dress in that book...

I decided to add it to the hem of a T-shirt dress for my favorite little 4-year-old twirling girl. She came over yesterday for a "fitting". Measurements were taken and I made this dress up for her in the size suggested. It appears to be quite roomy upon completion, she had to leave before Nana was done, I believe she'll have this dress to spin around in for several seasons. Since I finished it up after her departure and  I still had the dress here with more time to think about further embellishments I came up with a plan. Yes, it definitely could use a monogram! That's what happens when things languish in the vicinity of the embroidery machine.
Perfect!  Really, who wouldn't want to twirl around in a dress like this one? 

I made good use of that pom-pom trim, right down to those last few inches!
(The color in the photo below is much more representative of the actual hue than the above photos.)
Life is Good!


02 May, 2017

Project Bag

I made a Project Bag today, actually I made up several! This is the fourth in the series of organizers being highlighted each month at my LQS featuring Patterns by Annie. This quilted tote makes up quick and easy and is handy for keeping up with everything you might need in one place for any type of projects on-the-go. I made mine in the large size, which finishes to 13 inches square; these are the perfect size for fabric bundles and a pattern and/or book, for carrying completed and pressed quilt blocks, or anything else you can think of. The fabric requirements are minimal: a few coordinating fat quarters and you're good to go, the addition of a see-through vinyl window in front for easy identification of the contents and a zipper to keep it all secure. I think this is an ideal gift, too, I am already thinking about making a few up in children's fabrics and slipping in a coloring book and crayons or travel games for in the car! (There are three other sizes for this bag too, I might just have to make one of each.) What would you carry in your project bag?
       
Life is Good!

11 March, 2017

What's Nesting?

What's nesting at your house? It's almost spring, are there any birds eyeing your birdhouses yet? I haven't seen any here; but, there is nesting going on-- nesting baskets! You might remember that last month I posted about my LQS and its monthly "Let's Get Organized" club using patterns by Annie. This is the latest club project. I had a feeling that my oldest granddaughter might like a set of these in which to keep some of her little toys, trinkets and treasures. I took the pattern for her approval and she suggested the fabric colors. This "Dream and a Wish" line by Sandra Workman for Riley Blake designs fit the bill perfectly.

This was a fun project, it took me a little bit of practice to get the hang of it. My first attempt at a lid, on the smallest basket, ended up looking more like a popover than a flat-topped  basket cover. I persevered and quickly realized that if I stitched with the outer lid band "ring" on the top, to the round cover piece, flat against the sewing machine bed, s-l-o-w-l-y, it was possible to achieve a perfectly flat surface and a smooth seam at the same time. As stated in the directions! (Those wise words from the poster hanging in my seventh-grade home ec. room prove true once again: "when all else fails, read the directions!") In the end, I did remake a second lid for the smallest one. The results speak for themselves.
I learned a lot and enjoyed every step! I will definitely make more of these.
 I love the look of the little handles and the clear vinyl 
pocket on the fronts for labeling each basket's contents.
So, what's nesting at your house?
Life is Good!

21 February, 2017

Getting Organized

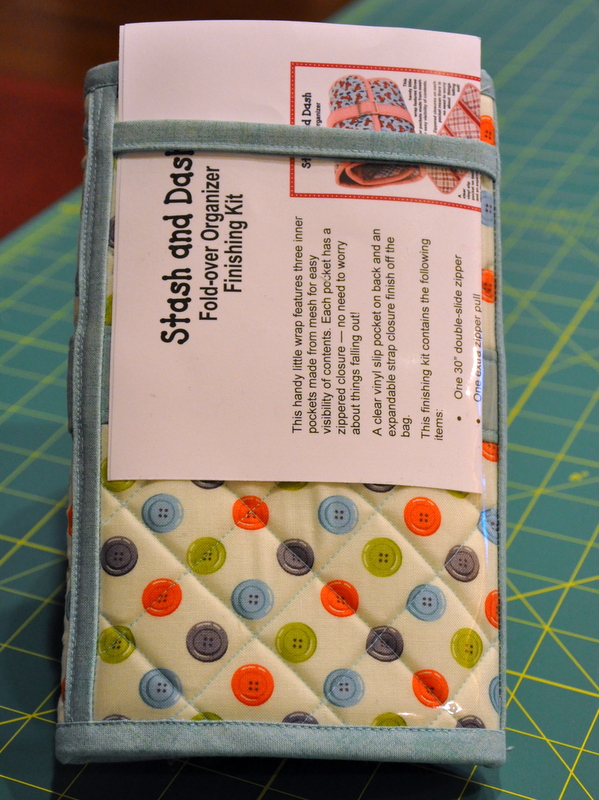
Stash and Dash Organizer - 8" X 5" when closed, as pictured.
 2017 is the year for getting organized at my LQS; they launched something new, a "Let's Get Organized" club featuring a pattern each month from patterns by Annie. The shop will highlight twelve different bags and/or organizers to make quilters' (or anyones') lives easier and more orderly...not to mention CUTER! This is last month's pattern: "Stash and Dash". The hardest part, for me, was choosing the fabric to use! I will make more of these, it is a great pattern with a wonderful finished product, but I will choose a busier fabric for the contrasting binding. Live and learn. This one worked out perfectly fine, but there's always room for improvement; since one is attaching binding and sewing through the layers, front to back, I did find that using an almost-solid did nothing to hide stitches that didn't align perfectly on top of one another. This isn't really a big deal, but I did make a mental note for next time (I am already planning my next one!). The first step was quilting the main body fabric and lining, using Soft and Stable inside, it made a wonderfully stable foundation and was easy to quilt through, I loved the process and was happy with the cross-hatching.
The inside of the Stash and Dash has three roomy, zippered, mesh pockets; perfect for filling with any treasures you want to grab, stow securely and take along. Who couldn't use one (or two) of these?
The pattern has easy-to-follow instructions for binding and zipper insertion, I felt like a pro with these results! The nice thing about the mesh pockets is that they are stretchy and can be over-filled as necessary, the sliding strap on the outside will adjust to accommodate whatever is contained inside.
The back of the Stash and Dash has a vinyl see-through pocket for including any necessary, accessible items you might need without opening or unrolling the organizer.
I couldn't wait to share this cute project with you. I highly recommend the pattern (the tips and techniques are terrific!) and feel more organized already, WOW; by the end of this year my organizational skills will should be epic. πŸ˜‰
Life is Good!