Showing posts with label directions. Show all posts

26 February, 2022

Checking it Twice?

It all started here, with the Great Granny Squared quilt pattern. Simple enough, right? Everything's cut out at one time and after this one is pieced together (72" X 85") there are enough left over pre-cut squares to piece another, bonus, quilt. Who doesn't love a bonus? 
And here it is! This one measures 54" X 66", a perfect lap or picnic quilt. Easy-peasy, right? Think again! If only it had been as easy a rolling out of bed. I was lucky enough to spend last weekend on a quilting retreat and came home on Sunday with the entire center section of the bonus quilt pieced. It was mindless sewing, I know better than to carry any complicated piecing on retreat; that would interfere with all of the chatting and snacking! So, on Monday morning, I pieced those top and bottom borders only to discover that they were eight inches too long! Huh? Something major was wrong here. So much for mindless sewing! A quick recheck pointed up the error of my ways. Each of these long rows was supposed to have a one inch spacer strip attached so that those blocks could "float" between the pieced columns. I hadn't inserted the spacer rows. There they were, in the bin, all cut and ready to go. Groan. 
Let the ripping begin! Each row needed un-sewing. It took half a day to begin to see some positive results. 
The circled area here highlights the repaired rows and the proper spacing. 
There's a big difference, those cute little blocks now have breathing room!
By dinnertime on Monday I had all but one row repaired. I'd lost an entire day! I wish I could say that this was the first time I'd made a mistake on a retreat weekend, but that wouldn't be truthful. I'm  more than experienced with the seam ripper! It's said that Santa checks his list twice. Had I done that with the directions, I could have saved myself a LOT of time and effort and not had to remake this one. Whew! Anyway, after all that, you might think that it stops here. Great Granny Squared and the Bonus Quilt would be two terrific accomplishments from all those precut squares, right? Well, guess what, it's not over yet! Nope, not by a long shot. I still have enough left over squares in my bin, from these same fabrics, to make a table runner too. Stay tuned. So, I'll be reading the directions completely through on this next project, and then I'll read through them again; to play it safe. Just call me Santa!

Life is Good!

05 September, 2019

Which Came First?

Which came first-- the dog or the quilt? Well, definitely, the dog came first; last month he celebrated his fifteenth birthday, but, he assuredly inspired this quilt pattern, don't you think? There's been a LOT going on in the sewing space these days, so much so, in fact, that I am woefully behind in posting to this blog. Hannes hangs out with me here in the studio and yesterday, when I looked up, this is what was looking back at me. So sweet! 😍


Speaking of Hannes and quilts-- do you remember when Lynnleigh insisted that Hannes have his own birthday quilt? She put some orphan String-X blocks together and we had a Hannes-sized nap quilt that same day. 


Since then it has been quilted, bound and enjoyed fully!


In honor of National Wildlife Day yesterday, we've been up close and personal with nature around here this summer. Our THIRD bluebird family fledged last week, five more babies(!) and twin fawns have been seen in the woods behind our home all summer as they've grown.
This smallish deer was spotted out the kitchen window while doing dishes the other day (sibling is on the very far left, almost out of frame); we were privileged to witness the baby bluebirds launching out into the world late one afternoon.
This wall quilt was worth the wait; begun in 1999 and hung last week in our bedroom. I just love waking up to this one each morning. 
 I had been working on this "Split Square" small quilt to use as a table topper, gathering the "charms" from my own scraps. (Pattern from Sew Charming by Mary Etherington and Connie Tesene). I pieced the blocks leader-ender style while working on other things. When it was time to set it together it DID NOT work! The edges didn't line up, but I struggled to make things fit. I "webbed" it using chain piecing but when I finally began sewing the rows together horizontally it was horrendous AWFUL. All the steam in the world could not convince these blocks to lay flat; there were puckers and pleats everywhere. I balled it up and threw it in the trash. I was defeated. But then, it began calling to me from the depths of my trashcan. "I wonder", I thought, "did I miss a step?" I went back to the book and realized that I had, indeed, missed a step-- a BIG ONE; the trim down! 🙄
I dug it out. I took it apart. I trimmed down the blocks (see above). I reassembled. Voila! Success. 
There is a lesson to be learned here-- don't give up, always do your best and read ALL the directions!
Let me conclude today on a sweet note. I have lots more to post, stay tuned; but in the meantime let me recommend this recipe that I got from our daughter-in-law for Peanut Butter Chocolate Cake that's mixed and cooked in the crock pot. It is easy to assemble and absolutely delicious. We topped ours with a scoop of vanilla ice cream. Which came first here? The ice cream-- Mr. Goodneedle is an ice-cream making machine; he lives to try new flavors and crank out more batches, but in this instance, it matters not which came first; combined in the same bowl at the same time is perfection!

Enjoy~
Life is Good!

06 December, 2015

52%

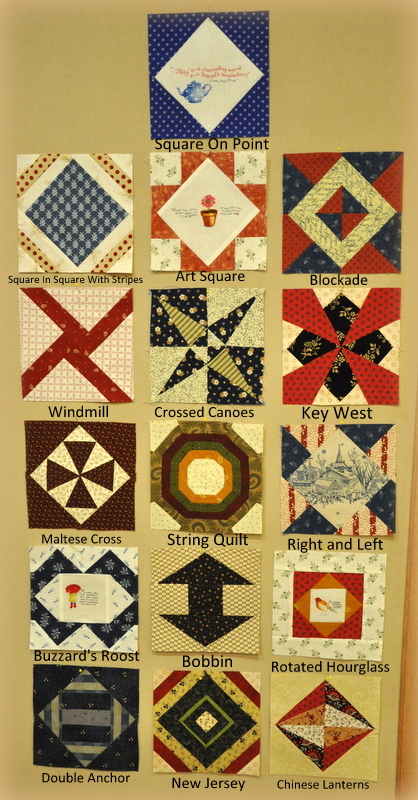
These are the latest blocks completed from Rosemary Youngs' Quilt Block Bible. Quiltkeemosabe and I are more than halfway through writing directions and making each and every block in the book. At my last calculation I was 52% done; now I am moving onto applique- curves, that makes me smile... I love me some hand work! So, what does 52% look like and how am I keeping track of our work, piecing/cutting directions and the blocks themselves?

52% equals two loose leaf binders, full. Each completed block is filed in order, by number, and slipped into a page protector together with all of of its pertinent data. We're using every method we know: specialty rulers, templates, paper piecing... whatever it takes.


I'm including a few close-ups here of the fussy cutting I did. I had a length of fabric with quotes and these positively charming illustrations by Susan Branch; perfect for these little block centers. This one says: "Millions long for immortality but don't know what to do on a rainy afternoon" - Susan Ertz
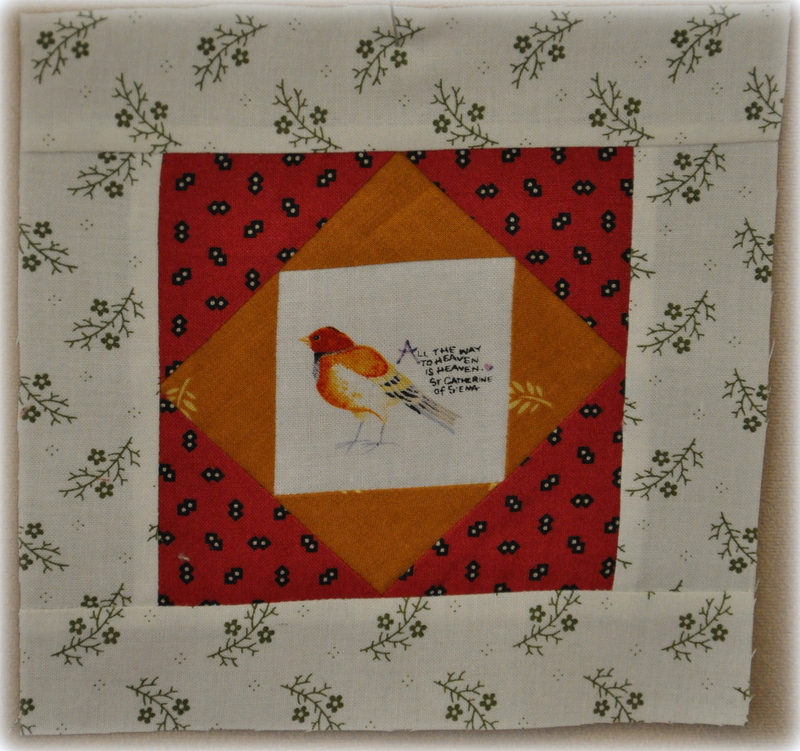
 "All the way to Heaven is Heaven" - St. Catherine of Sienna

No quote, but a perfect resting place for this toile fussy cut. 
And, finally... this makes me want to brew a cup of tea right now... and read Little Women... again!
Life is Good!

03 February, 2014

Wake Up To Warm

I discovered this Multigrain Hot Cereal from Trader Joe's when I stopped in to buy the regular steel-cut variety oats last week. During the winter months we love nothing better than waking up to a bowl of warm, steaming cereal that has cooked overnight in the crock pot. Last night I set the slowcooker up using this multigrain cereal and plugged it in; good to go... or so I thought. Let me caution you not to try this without your glasses on! This morning when I got up I could hear the lid to the slowcooker jiggling furiously, strange, I thought; the sound was accompanied by a roasty-toasty smell. I turned on the overhead light and lifted that jiggling lid to find the crock lined with well-cooked, multi-grain leather. Yep.  I checked the setting, only to find that it had cooked it on HIGH for seven hours! This isn't a set-up that I recommend, unless you want hot cereal jerky. What I can recommend though, highly, is this cereal; cooked the proper way, it is absolutely delicious.


Here's the recipe for overnight hot cereal in a slowcooker:
Butter the inside crock of your slowcooker and add an amount of dry cereal grains consistent with the number of servings that you wish to prepare (check the label). Whatever that amount is, triple it in liquid (can be all water, all milk or water/milk combination) and add that to the dry cereal, stir to mix. Put on the lid and set your slowcooker to WARM (or your lowest setting). 

Believe me, I know precisely where that setting is now; I've woken up... to "warm"!
Life is Good!

22 January, 2014

Where Am I Headed?

Back in December I joined a round-robin group at my LQS entitled "Head For The Border". This is a round-robin that never leaves the hands of the original quiltmaker, everyone works on their own creation the entire time. As a way of sparking creativity and building skills, the unknown for the next border "round" is revealed each month by the drawing of a color and a design element to be used from a brown paper bag. We don't know where we're headed... it's the journey that makes this experience so much fun.
In order to develop a sense of direction toward the destination it's important to not only know where you are but how you got there. I often find myself relying on the most basic skills that I learned in the very first quilmaking class I ever took, back in 1983. (Are you reading this, Ann?) Back then we cut templates from plastic and drew every seam line with pencil. I don't use mylar sheets anymore for templates but sometimes certain situations (unusual sizes) call for me to draft the shapes in EQ7 and print them onto freezer paper sheets. I cut them out (on the stitching line) and iron them to the backside of my fabric pieces; then lightly draw around those shapes with a fine mechanical pencil. The pieces won't shift (I use a sandpaper board beneath the fabric pieces to ensure stability while tracing) and then cut them out 1/4" beyond the drawn line. The freezer paper is reusable (over and over and over...). This is much more accurate than using rotary cutting directions to the 1/16th or 1/32nd of an inch. I'm happy to have a solid piecing foundation, basically anything that can be drafted can be stitched using this technique. Even with a closetful of specialty rulers and a die cutter it's always a good feeling to return to the basics.
Ready for tomorrow... my "Head For The Border" medallion work in progress. This now measures 23.5" square; I believe there are to be three more "rounds". The four "Winding Ways" blocks are where I began. Round #1 saw us adding the color black and the design element of rectangles; round #2: green and flying geese. I can't wait for tomorrow's reveal and to see what everyone else has come up with. As for me, I may not know exactly where I'm headed, but I am guided by good directions and am having an enjoyable time getting there. I believe I am going to name this one "The Long And Winding Road". Stay tuned for more clues along the way to the ultimate destination.
Life is Good!