Showing posts with label handmade gifts. Show all posts

27 December, 2018

It's A Wrap

... and just like that, another Christmas is history. 2019 is looming just around the corner. I can finally post about a few things that I have been stitching. Using this pattern by Atkinson Designs I managed
to make up quite a few batches of these zippered pouches that will be good for toting all sorts of goodies and whatnots. For the most part, I constructed them in sets of threes to give as gifts.
But then, I got to thinking-- the medium size is just perfect as a unique presentation for a cash gift. I stitched up another batch especially for that purpose, these were made up from Christmas and winter-themed fabrics and distributed to family on Christmas. 
They were a huge hit! All tolled, I believe I stitched up somewhere between 25 and 30 of these. I can now do it with my eyes closed! One thing that I did learn along the way is that there is absolutely no consistency whatsoever when it comes to pricing all-purpose zippers! Shop around, there are bargains but you do have to hunt.  
And, speaking of huge hits; Gregory loved his new quilt. 😊
Hannes received something cozy, soft and warm from Santa for his sleeping enjoyment as well. 😉

Yes, another Christmas has come and gone. On Christmas afternoon Mr. Goodneedle and I watched a movie that I had never before seen. I realize that you're shocked and that I might be the last person on earth to admit that I had never watched this quintessential Christmas movie. I knew that another year could simply not conclude without viewing Jimmy Stewart and Donna Reed. It truly was wonderful!
There was popcorn, too!
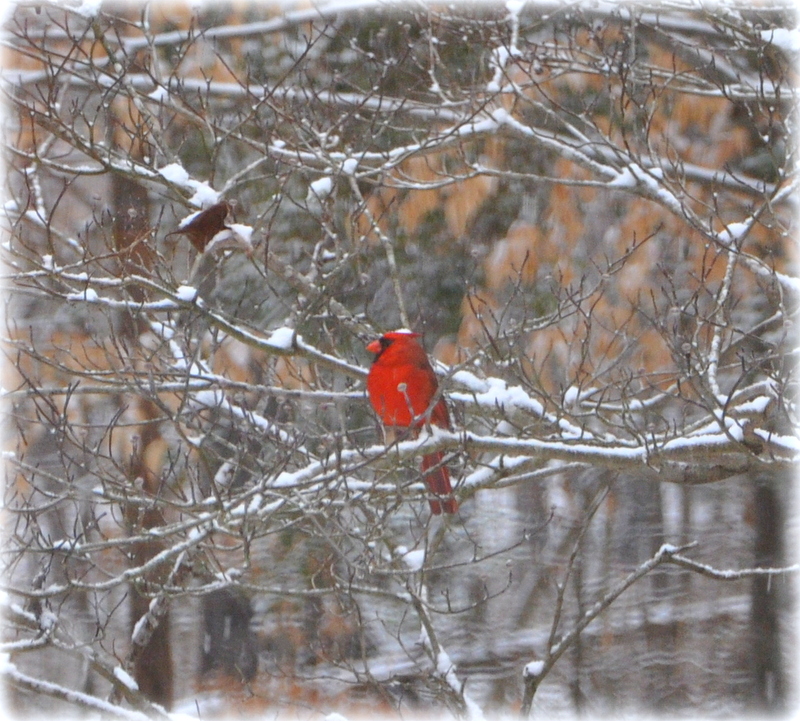
Life is Good!

26 January, 2016

This, That and The Other Thing

There's been lots going on: random things-- this, that and the other thing; think of this as a potpourri post, a way to catch up all at once. I wanted to brag on my daughter-in-law. She's been having lots of fun with her Cameo Silhouette electronic cutter; she's created wonderful iron-on transfers for T-shirts, dresses and household items as well as labels for everything... I asked her if she would make me a "water" label to differentiate this spray bottle that I use for thinning royal icing from an identical bottle of homemade granite cleaner for the kitchen (I wouldn't want to mix up those two!). She rose to the occasion, creating word art at its finest! I love this water bottle now, there's no doubt as to its contents.

While on retreat at the beginning of this month I stitched up a whole heap of pretty little Charger Cord-Wraps for myself and for gifts. My drawers are pretty again, no more charger cord tangles! I found the tutorial here.
The storm of last week loaned itself to some lovely photo-ops, I got lucky with this one; our state bird.
Before the snow flew our neighbor completed a gorgeous picnic table and bench for his family; he was proud to take it home. Ben has been a woodworker's apprentice in Mr. Goodneedle's workshop for over a year now. He seems pleased in this photo with the finished product, as does his mentor!
In preparation for The Quilt Block Bible (book by Rosemary Youngs) Study this week, I have completed and written up directions for five more blocks. I'm chipping away, block by block.  These were pretty straight-forward piecing. I have a pile of applique blocks to catch up on. I will do those by hand and am saving them for road trips and down-time handwork.
Through the piecing of "Rustic Rails" (see yesterday's post) and the aforementioned Bible Study blocks I have been adding to a second tumbler charm quilt top (the first was completed last summer) it is also being sewn Leader-Ender (thanks, Bonnie!) style, this one has grown by leaps and bounds as other piecing is accomplished.  I plan to keep both of these quilts in the cars in case of emergencies; one never knows when a quilt might be needed.
Pre-cut tumbler scraps, lights and darks, reside in their own little bins right beside the machine ensuring that every time something passes beneath the presser foot something else is accomplished simultaneously. Can you say efficient?  That's it for this random catch-up post; hopefully subsequent posts will be more single-subject structured and easier to keep up with!
Life is Good!

28 December, 2015

Stitching Up Some Love

I haven't shown a lot of things that I've been sewing lately, mainly because most of the needle and thread activity going on around here has been for gifts! Now that Christmas is behind us, it's safe for me to share. I quilted stacks and stacks of squares and rectangles:
that combined, with a layer of insulbrite in between, to become potholders! I copied this idea from a link found on Pinterest to put together some bundles of love for friends and family. They turned out cute... nothing says lovin' like something for the oven kitchen!
Back a few years ago I embroidered some personalized elf hand towels for Mason,Lucy Ann and Gregory. I don't know how Lynnleigh was overlooked, but the last two years she never got one! 
Her hands are dry now, she has her own towel. For some reason she named the visiting "elf on a shelf" at their home Peggy. When she spotted her own hand towel, hanging beside her brother's, she called to her Mom: "I have an elf towel too, it says "Peggy" on it!" I pointed out the "L" and asked her to guess again at the name on her very own towel. "Oh" she replied, and after thinking about it for a few minutes she called out: "my elf towel says Lynnleigh and Peggy"!
Life is Good!

14 April, 2015

Blog Hop And A (Double) Giveaway

As previously advertised; today I am posting for Prairie Sewn Studios as part of a blog hop on the first anniversary of the publication of their book, Contain It!. This is your chance to receive a copy of the book directly from the authors, Linda Chaney and her daughter, Laura Gerth by simply leaving a comment here. Their book expertly leads the reader beyond typical English paper piecing by building off of that technique and taking it to a whole new dimension... literally! By following the logical, well illustrated steps, as outlined, you'll be able to construct structural containers in no time at all. I used their process and quickly went from a one dimensional form forward to create a customized box; just perfect for gift-giving!

The first thing I made from the book was a coaster, it was easy to make and it looked great!
More coasters followed the first, until I had a set of six... all from one charm pack; cute! 


Making a set was a great confidence builder.

I measured the stack of coasters and decided to move on to a 3-D box, made to my own specifications, all the while following the illustrations and how-to directions in the book.
Success!

To see what other bloggers have created out of Linda and Laura's book, be sure to follow this blog hop using the schedule below. You'll not only be inspired by all the cute projects but you'll also increase your chances of winning this great book! Just think, you'll be creating your own custom gifts for every occasion in no time! To be eligible for the book giveaway be sure that you're able to be contacted via e-mail and don't have your settings set as "no reply"; if so, be sure and include your e-mail address with your comment. You must also have a US snail mail address. I'll definitely be making more projects from this book, I love the scalloped-top vessels and other functional boxes. Believe me, this is a book you'll be happy to add to your library!

April 13 Daryl of Patchouli Moon Studio 

April 14 Mrs. Goodneedle from The Strawberry Patch

April 15 Christa of Christa Quilts 

April 16 Andrea of Knitty Bitties

April 17 Terri of Hexy Lady

April 18 Ren of The Inspired Wren

I'll be drawing a random number from all the comments received on Tuesday, 21 April to win the book. I will also give away this set of coasters in their own cute, custom-made container to another commenter; there you go, two chances to win... a definite WIN-WIN! But, you really can't lose. If you don't win a book this week you can buy your own copy using the link above, you'll be a winner in the creativity department soon after it arrives in your mailbox. 
Good luck~
Life is Good!

09 December, 2014

Nothin' Says Lovin'...

... like something from the oven  sewing machine!

As soon as the last morsel of Thanksgiving pies were gone I began making pies again! First, I made a strawberry pie, (my favorite all-time dessert) it was my prototype. There's good news about this type of pie; it won't add one single ounce, it's a hot pad!  During our cross country quilt shop hop  this past summer I discovered this pattern (click here) at Jackman's in St. Louis; I knew immediately it would be perfect for Christmas gift giving.  Isn't it just the cutest thing? I found plenty of dough-colored rick rack there and stocked up on it, expressly for this purpose. I was lucky enough to find some varied fruit fillings too. These hot pads will protect hands and tabletops; they're made with both one layer of batting and a layer of Insulbrite heat-resistant lining material.
Four more pies in the construction stage, two mixed berry and two blueberry; lattice is woven and ready to stitch down before trimming into a 9" circle. I machine stitched a greeting to the bottom of each pie "tin" before layering them together and binding the edges.  The fluted "crust" is added as the final step and hand tacked into place.
Five pies, stacked and ready to go. The best part? No need to even preheat that oven!
Life is Good!


26 March, 2014

Fun And Done!

The Batting Buddy is a  two-piece "template" that nests within its outer frame.
Last week a friend asked me about the "Batting Buddy" ruler when she saw it hanging on the ruler board. It's been awhile since it saw any action and I was happy to get it down and show her how it works. In fact, I decided I could best demonstrate it to her by creating something and you know how that goes... one thing leads to another... and my Batting Buddy leapt out of retirement and onto center stage! I blogged about this back in 2009 when I created a quilt for children; it has been much loved and well used since then.
The center piece of the template is for cutting batting scraps... I have a ton of those!
The outer frame portion is for cutting out the backing pieces. Once the backs are cut the batting piece is placed within the "window" opening and the outer frame template is carefully lifted off. An even margin of backing fabric remains exposed on all four sides.
Scraps and strips are positioned over the batting, and stitched down through all three layers using a "flip and sew" technique until the central batting square is covered with fabric pieces. I happened to angle my pieces acroos the corners but straight sets or even crazy-patch would work just fine. If you click on the "Batting Buddy" link above you can find some beautiful patterns utilizing this tool, for the quilting purists out there, mine is a much more impromptu "stitch up what you've got" method.
The covered piece should look like this, with the added fabric edges irregular and protruding.
Flip the unit over and carefully peel the backing fabric up and away from the batting edge, fold the backing onto itself, this folded edge, of backing fabric only, should be well protected under a ruler before trimming.
Position the ruler exactly along the exposed edge of the batting taking precautions to have the folded backing fabric completely under the ruler and below your cutting line. Believe me, you don't want that blade edge to come in contact with the folded edge of the backing fabric! Trim away the excess fabric strips right along the batting edge, rotate the block and continue this method on all four sides.
Your trimmed block should look like this.
If you choose to join your blocks (I'm constructing a table runner) you will align them WRONG SIDES TOGETHER pinning precisely along the batting edge (check top and bottom to ensure that both blocks are aligned) and stitching right along that same edge, removing the pins as you go. Stitch from the top of backing to bottom of backing using that same line. (I drew a pencil line as a guide on the backing fabric.) 
Turn the raw edges under on the front side. I folded mine in so that the raw edge met the seam line and pressed in the fold. I used a few drops of school glue under the fold and pressed with a hot dry iron to hold the fold in place until I top stitch these joins. I like to use a decorative stitch at this point and have been experimenting with some of the triple stitches built into my machine but any securing stitch will be fine. Join all of the blocks in this manner until several rows are complete. The long rows will be joined in exactly the same manner; wrong sides together, pin to align, turn back the raw edges on the front, and secure. The beauty of this is that once your creation is all joined the edges are finished by this same method and you're done... quilting and all! Just like the template says: "Fun and Done!" Now, who doesn't love that?
These blocks can also be finished individually! In this pot holder I replaced the batting with two layers of Insul Brite and added a hanging loop. This would be perfect for gift giving at any time.
Or, how about a mug (and cookie) rug?

I was born and raised in New England where the old Yankee adage: "Use it up, wear it out, make it do, or do without" was often heard. Dusting off the Batting Buddy was just what I needed to do as a way to move out the scraps from my latest low volume quilt projects as well as reduce my batting scrap mountain!
 "Why?" You may ask. "Here's why:


The low volume bin is filling up again with new and exciting pieces that I'm just itchin' to stitch.
And, naturally, there will be leftovers that move to the scrap bin... and sew it goes... all over again!
Life is Good!
 

20 March, 2014

Sewing With PUL

A few weeks ago a request came to our small Quilting Bee from a fellow member, Spokes and Stitches, for handmade bibs. There is a project underway through Love Without Boundaries for items to make the lives of babies undergoing cleft surgery a little brighter and more comfortable.  I found a free online bib pattern by Heather Bailey and began to pull fabrics from which to make up a few; that was, until, I had an in-person conversation with my friend who made the request. She has a son who has already undergone one cleft surgery; her sweet boy has a second one scheduled for next month. She well understands the need for these bibs and she likes for his to be as waterproof as possible. She explained that since drool is excessive a shirt can quickly become soaked through; she showed me some PUL; a waterproof fabric that she had only just purchased. PUL was new to me; it's soft to the touch and comes in solid colors as well as child-friendly prints. After seeing hers I decided to give it a try; I got some and found it to be extremely easy to work with. I used PUL for my bib fronts, backing them with soft flannel. The only special attention that I gave to this new-to-me fabric was a fresh, sharp, needle and avoidance of placing the iron directly onto the PUL itself. I did press the bibs, and they did just fine, but I pressed them from the flannel side.
While sewing the bib fronts and backs together I kept the flannel side down, against the throat plate, so that the bibs would feed through smoothly and not "stick" or bog down. I used an overedge stitch for construction. The PUL that I bought was in a three-pack of precuts, each piece measured 21" X 24" and, with precise attention to placement, I found that I was able to get three bibs from each piece! I had never made bibs before, this pattern was wonderful to work from; I found the process to be fun and rewarding!
Try something new today, I, for one, am glad that I did!
I hope and pray that these bibs will be much loved and well used by their precious little recipients.
Life is Good!