31 March, 2014

What's All The Buzz About?

Today is "back pocket" kind of day here; one you'd like to tuck away to retrieve whenever you need a perfect day with a cloudless blue sky, spring bursting forth and gentle sunshine to warm your body and soul. I walked out to the mailbox and could hear a loud drone coming from deep down in the woods, or so I thought; I walked back down the driveway and realized that now the sound was coming from behind me... that's when I looked UP. Right there, buzzing high over my head, were thousands of bees buzzing about the flowers in the Bradford Pear trees that line the edge of our driveway. These trees, while lovely in leaf, have never bloomed well in the past due to being sheltered, and shaded, by taller tree cover from the woods behind them. That all changed last June when we lost a good number of those tall trees to a fast moving and destuctive storm. These Pears remained, untouched, and treated to much more light and sunshine than ever before; hence, their newly acquired blooming status and thousands of buzzing visitors; have a listen here. For all the sadness that I have carried in my heart over losing those big trees I never imagined this surprise that arrived with the change of seasons; God's unexpected gift of glorious flowering trees, and a choir of buzzing bees to announce their presence!
The Forsythia are blooming too, but in a much quieter fashion.
Wishing you a "back pocket" kind of day, wherever you may be.
Life is Good!

27 March, 2014

What Is It?

Can you guess what this is? It was handed to me last evening at church before the beginning of our mid-week Lenten service, a gift from the gentleman who sits in the pew in front of us every week. He and Mr. Goodneedle are both woodturners and share lots of great project information with one another. Go ahead and take a guess before you scroll down. I'll give you a hint: I couldn't carry this onto an airplane.

Isn't this cool? Did you guess a double-barrel seam ripper?
Or, as I like to think of this: a quilter's version of the Swiss Army Knife!
With special thanks to Jim.
Life is Good!

26 March, 2014

Fun And Done!

The Batting Buddy is a  two-piece "template" that nests within its outer frame.
Last week a friend asked me about the "Batting Buddy" ruler when she saw it hanging on the ruler board. It's been awhile since it saw any action and I was happy to get it down and show her how it works. In fact, I decided I could best demonstrate it to her by creating something and you know how that goes... one thing leads to another... and my Batting Buddy leapt out of retirement and onto center stage! I blogged about this back in 2009 when I created a quilt for children; it has been much loved and well used since then.
The center piece of the template is for cutting batting scraps... I have a ton of those!
The outer frame portion is for cutting out the backing pieces. Once the backs are cut the batting piece is placed within the "window" opening and the outer frame template is carefully lifted off. An even margin of backing fabric remains exposed on all four sides.
Scraps and strips are positioned over the batting, and stitched down through all three layers using a "flip and sew" technique until the central batting square is covered with fabric pieces. I happened to angle my pieces acroos the corners but straight sets or even crazy-patch would work just fine. If you click on the "Batting Buddy" link above you can find some beautiful patterns utilizing this tool, for the quilting purists out there, mine is a much more impromptu "stitch up what you've got" method.
The covered piece should look like this, with the added fabric edges irregular and protruding.
Flip the unit over and carefully peel the backing fabric up and away from the batting edge, fold the backing onto itself, this folded edge, of backing fabric only, should be well protected under a ruler before trimming.
Position the ruler exactly along the exposed edge of the batting taking precautions to have the folded backing fabric completely under the ruler and below your cutting line. Believe me, you don't want that blade edge to come in contact with the folded edge of the backing fabric! Trim away the excess fabric strips right along the batting edge, rotate the block and continue this method on all four sides.
Your trimmed block should look like this.
If you choose to join your blocks (I'm constructing a table runner) you will align them WRONG SIDES TOGETHER pinning precisely along the batting edge (check top and bottom to ensure that both blocks are aligned) and stitching right along that same edge, removing the pins as you go. Stitch from the top of backing to bottom of backing using that same line. (I drew a pencil line as a guide on the backing fabric.) 
Turn the raw edges under on the front side. I folded mine in so that the raw edge met the seam line and pressed in the fold. I used a few drops of school glue under the fold and pressed with a hot dry iron to hold the fold in place until I top stitch these joins. I like to use a decorative stitch at this point and have been experimenting with some of the triple stitches built into my machine but any securing stitch will be fine. Join all of the blocks in this manner until several rows are complete. The long rows will be joined in exactly the same manner; wrong sides together, pin to align, turn back the raw edges on the front, and secure. The beauty of this is that once your creation is all joined the edges are finished by this same method and you're done... quilting and all! Just like the template says: "Fun and Done!" Now, who doesn't love that?
These blocks can also be finished individually! In this pot holder I replaced the batting with two layers of Insul Brite and added a hanging loop. This would be perfect for gift giving at any time.
Or, how about a mug (and cookie) rug?

I was born and raised in New England where the old Yankee adage: "Use it up, wear it out, make it do, or do without" was often heard. Dusting off the Batting Buddy was just what I needed to do as a way to move out the scraps from my latest low volume quilt projects as well as reduce my batting scrap mountain!
 "Why?" You may ask. "Here's why:


The low volume bin is filling up again with new and exciting pieces that I'm just itchin' to stitch.
And, naturally, there will be leftovers that move to the scrap bin... and sew it goes... all over again!
Life is Good!
 

24 March, 2014

Anticipation

We made pizza from scratch for supper last night. 
Gregory created his own: a little bit of sauce and a LOT of cheese;
he could scarcely wait until it was done baking.
Between last evening and lunch today not even a crumb remains.
Life is Good!

23 March, 2014

Destination: Unknown

"Destination: Unknown" ~  31" X 31" (so far).
You all have been with me for the ride on this "Border Run" challenge from the beginning. It all started along the "Winding Way" with the central four blocks. Following assignment #1,  I added RECTANGLES in BLACK. Easy enough, and so the black and white continuing design element began. Assignment #2 was FLYING GEESE and GREEN; not too difficult. And then, it got harder; at our last group meeting SQUARES were drawn from the sack and the color BROWN! Brown? Really??  I recognized fairly quickly that, at this step, the challenge had been thrown down. I'm ready for our next group meeting at my LQS on Thursday, I've completed my homework. What's next? Nobody knows, it's up to a random draw from two brown paper sacks. This journey continues, my seat belt is fastened; it's full speed ahead!
Life is Good!

22 March, 2014

Ami's Amazing Puzzle Ball

I was contacted a while back and asked if I would be willing to test out a brand-new pattern for Ami Simms. I agreed, quickly; as many of you know I love everything that Ami comes up with and her patterns are, hands-down, my most used! There were a number of affirmative responses to Ami's query, from all over the country, and a test-panel was composed. We each received a package including everything we needed to make a "puzzle ball" and an early-draft test pattern. The sewing began! E-mails flew back and forth, there was a constant flurry of activity among the panel! There were corrections, additions, deletions and, ultimately, there were puzzle balls! Lots of them!!  Ami is smart. She thinks and rethinks, she pushes and delves into each stitcher's brain. Her patterns don't go public until she is satisfied that each step is defined, explicit and well-illustrated... tried and true! You know how it feels when you purchase a pattern that is vague and short on directions, one that leaves you hanging; it's not any fun at all, you feel frustrated and cheated. I guarantee that won't be the case with this pattern; the Amazing Puzzle Ball was fun to make, each step is made abundantly clear, and it goes together very well.
Here's my completed "test" version. Isn't it amazing? It's every bit as much fun to hold as it was to make!

This is the amazing ball taken apart... that's the "puzzle" part! Isn't this genius? Fun for everyone!
You can watch Ami disassemble and reassemble one here; it's easy peasy!

You can pre-order the pattern here.
Roll with me on this; you know someone who would love one. 
But, I'm betting, you won't can't stop at just one!
Make one for a friend, a cat, a child you love; 
make one (in each size) to keep for yourself,
you can't let them have all the fun!
Life is Good! 

21 March, 2014

Outgoing...

The last few weeks have seen many things running under the needle and straight out of the house. A baby quilt, variation of this pattern, was finished up and gifted last weekend.
The recipient is a sweet baby girl who just so happens to have two older brothers. This quiltmaker decided her quilt needed to be delicate, feminine and personalized... just for her.

The embroidery machine has been humming, too. I made up some special burp cloths for another new baby. In between projects I've added names to a few shirts, an Easter basket and some draw-string bags, all of which have gone to live elsewhere.
Last Saturday the smart and talented Lady L. (with the assistance of Sundance) stopped by and quilted this vibrant baby quilt that is to be a gift for a family friend. She, and her equally smart and talented Mom, (Lady L. comes by it honestly) pieced this quilt as a team; now her Mom is finshing up the binding. It was a great way to spend the morning on National Quilting Day! One more beauty to be in, out, and on its way!
Life is Good!
 

20 March, 2014

Sewing With PUL

A few weeks ago a request came to our small Quilting Bee from a fellow member, Spokes and Stitches, for handmade bibs. There is a project underway through Love Without Boundaries for items to make the lives of babies undergoing cleft surgery a little brighter and more comfortable.  I found a free online bib pattern by Heather Bailey and began to pull fabrics from which to make up a few; that was, until, I had an in-person conversation with my friend who made the request. She has a son who has already undergone one cleft surgery; her sweet boy has a second one scheduled for next month. She well understands the need for these bibs and she likes for his to be as waterproof as possible. She explained that since drool is excessive a shirt can quickly become soaked through; she showed me some PUL; a waterproof fabric that she had only just purchased. PUL was new to me; it's soft to the touch and comes in solid colors as well as child-friendly prints. After seeing hers I decided to give it a try; I got some and found it to be extremely easy to work with. I used PUL for my bib fronts, backing them with soft flannel. The only special attention that I gave to this new-to-me fabric was a fresh, sharp, needle and avoidance of placing the iron directly onto the PUL itself. I did press the bibs, and they did just fine, but I pressed them from the flannel side.
While sewing the bib fronts and backs together I kept the flannel side down, against the throat plate, so that the bibs would feed through smoothly and not "stick" or bog down. I used an overedge stitch for construction. The PUL that I bought was in a three-pack of precuts, each piece measured 21" X 24" and, with precise attention to placement, I found that I was able to get three bibs from each piece! I had never made bibs before, this pattern was wonderful to work from; I found the process to be fun and rewarding!
Try something new today, I, for one, am glad that I did!
I hope and pray that these bibs will be much loved and well used by their precious little recipients.
Life is Good!


17 March, 2014

A Cheerful Giver?

Let me share something that I witnessed last week; it's an experience that I wish I hadn't been present for, but certainly it was one hard to ignore and easy to learn from. I had stopped at a big chain fabric/craft store last week, in the early afternoon, for an item that I can't find elsewhere. I encountered an irate customer there who had stopped to buy an advertised sale item only to find that the store had depleted their stock of that item shortly after the doors had opened for business that morning. The clerk was apologetic and offered other, like items, also at a discounted price; but she wouldn't even consider a substitute. She was angry, boisterous and downright rude in her behavior toward the clerk. I was standing in line to be helped, with others; those of us who were waiting exchanged pained glances, it was embarrassing and awkward to be in the presence of this raging customer. But then, she said something that struck me... to the core: "I won't spend a penny more than I need to" she bellowed, "what I am working on is for charity, not for myself, so the cheaper the better!"


"Please, God,"
I prayed to myself on the way home
"show me every day the joy associated 
with giving abundantly and freely to those in need.
Remind me that You love a cheerful giver 
and let me offer my very best at all times 
so that only glory is returned to You." 
Amen.

Life is Good! 

16 March, 2014

Mission Accomplished (Almost)!

Six months ago I turned our dining room into a photo documentation center. Using the full length of our dining table (with two leaves in place) and two additional folding tables for sorting purposes I was well on my way to organizing a  lifetime's worth of photographs into designated, labeled, boxes.
Long ago, before photos were saved onto onto hardrives, they were stashed in boxes, bags and drawers; you name it, I had pictures squirreled away there! Well, as life happens and, eventually, the dining room was needed for its intended purpose, the sorted photo piles needed to be moved. Out of sight, out of mind; that saying held true for this project. This past week I decided that the time had come to conclude this epic task! What caused me to lose my motivation late last fall?
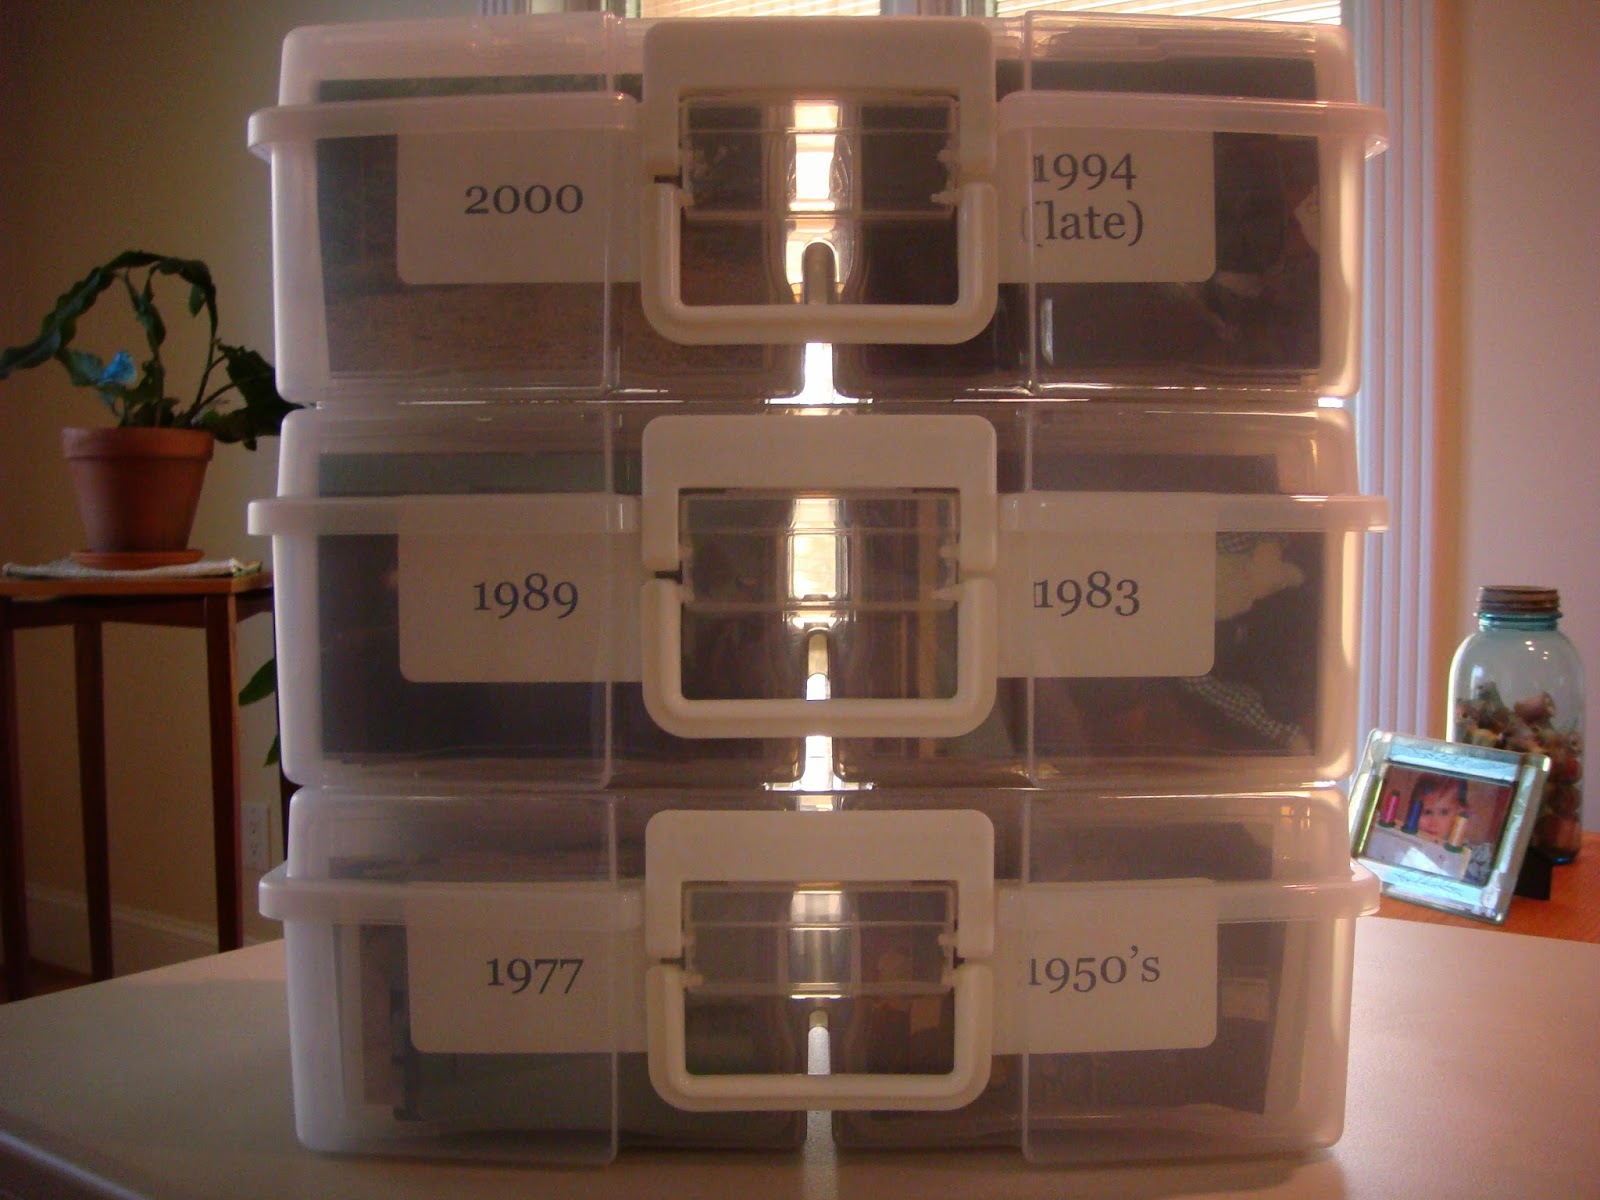
This did! I opened the armoire in our guest room to find boxes, and a basket filled to overflowing, with more photographs that had missed the initial sorting/documentation process. At the time I sighed and closed the doors back up, feeling defeated. My husband urged me to not let that get the best of me and to carry on with finishing up what I had already started. I did just that! All of the photos that I had begun with are now neatly stored away, grouped chronologically by year; 1950's through 2005! Can I get a shout out? I will, gradually, tackle the newest "finds" and add them to the mix. I'll need another storage box from The Container Store, to get current, but will wait to buy one when they run them on sale again; that won't stop the sorting and organizing, though! This is the system that I am using:
These individual boxes allow for additions and deletions within each box; a brilliant system. Now to get on with the remaining piles. Wish me luck!
Life is Good!

14 March, 2014

No Time?

We had a wonderful guild program on Monday evening, presented by none other than the Salem Stitcher. The program was based on this book, North Carolina Quilts, that is a compilation of the data and stories collected during the North Carolina Quilt Project which documented 10,000 quilts across this state from September 1988 until January 1989. The quilts represent the quiltmaking tradition of the women of North Carolina from 1800 to 1976. I've had the book for decades, I've read it cover to cover, I even attended a showing of some of the quilt collection at the NC Museum of History 25 years ago. But, through their stories, the presentation this week brought alive to me, once again, the stories of those early quiltmakers and what they endured to cover their loved ones, and their beds, with beautiful handmade quilts. These are stories of perseverance and dedication. I was listening, intently, and realize there are no excuses for me, in this time, NOT to finish what I have started with all that is so readily available to me. I cannot say, in all good conscience, that "I have no time" if I dare to look back at history and these stories from our quilting foremothers:
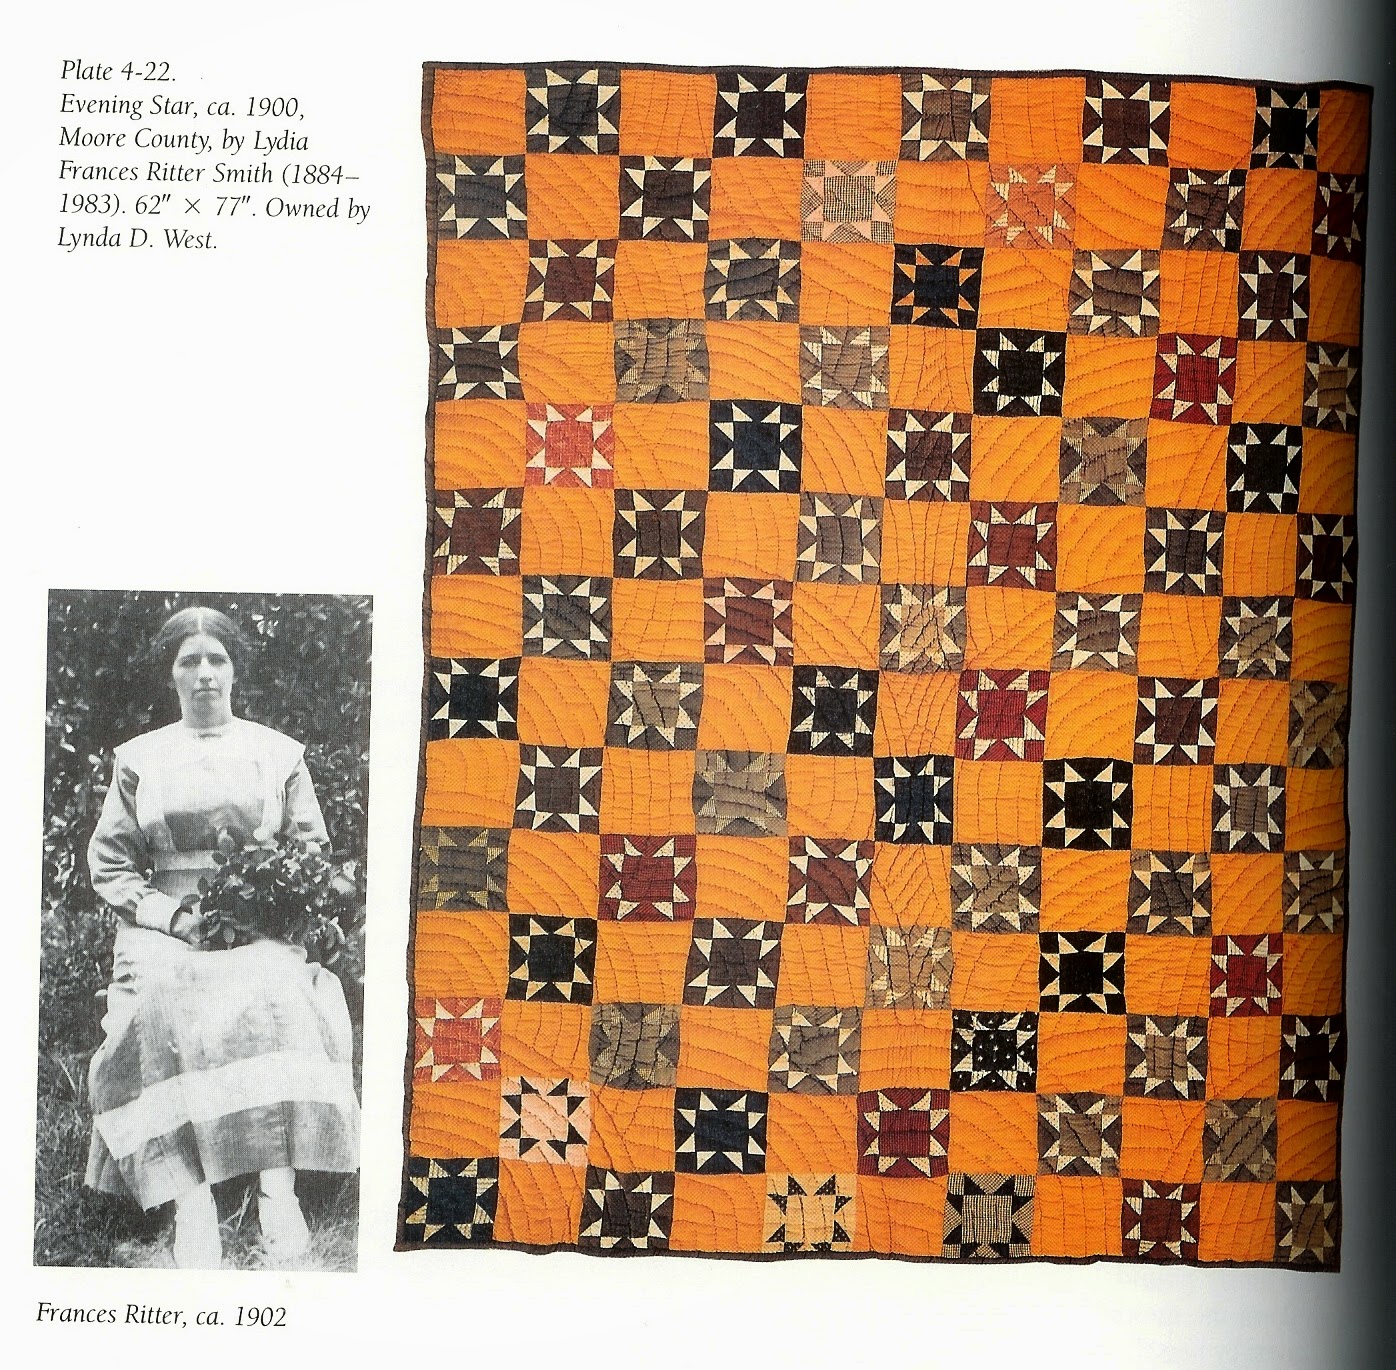
"Lydia Frances Ritter (Smith) (1884-1983) Grew up on a farm in Moore County. One of eight surviving children, she knew the importance of hard work and excellence. All of her life she heard stories of how her grandfather helped sustain the community after the Civil War. Her mother was descended from prominent Revolutionary War gunmakers, the Kennedys of Philadelphia, a branch of whom carried on theor artisan tradition after relocating to Moore County.  North Carolina farmers of the era were generally quite self-sufficient.  With few exceptions, they grew and produced within their own acreage almost everything needed to sustain life.  A cash crop provided them with credit to purchase supplies at a nearby country store.  Family tradition and strong religious faith formed the moral backbone of their lives.  No work was ever done on the Ritter farm on Sundays.  In spite of threats of damaging weather approaching, no harvest took place on the Sabbath.  Frances's father simple stated, "God knows my crops are in the fields."  Resourcefulness and responsibility were keystones in Frances Smith's life.  It was she who remained on the farm to care for her elderly parents.  After their deaths this small woman (she weighed ninety pounds), her uncut hair parted severely down the middle, continued to plow, plant and harvest by herself. Her marriage to Hallie Smith came after she turned fifty.

Much of the cloth Frances used in her quilts was recycled.  She carefully unraveled the string from feedsacks, wound it into hanks, and tossed it into the dyepot with her cloth, to use as quilting thread.  The batting was "yellow cotton" gathered from the farm, unopened bolls left in the fields that opened after the first frost.  Her Evening Star quilt (above) is especially noteworthy in that it is made from alternate plain blocks, whereas most quilts of this era are made with plain, wide, single sashing.  This was an old an classic pattern that lent itself well to a scrapbag palette.  Frances was proud of her quilts.  Like many old houses, the Ritter homeplace had been built without closets, making storage a problem.  When not in use, her quilts were stored on a "quilt table", a simple four-legged structure on which they were folded and stacked.  Because she dyed most of her own fabric, using both commercial and natural dyes, she knew that the colorfastness of her fabric and thread was vulnerable.  To protect her quilts, a heavy window curtain known as a "tielet" was hung from the wall behind the quilt table and drawn around the quilts to keep the sunlight from fading them.  Late in life (she was still quite alert well past her ninety-eighth year) she made sure that her niece, who is heir to the quilts, knew their stories and the family remembrances that are part of them."  
- from North Carolina Quilts, 1988, The Univesity of North Carolina Press, Chapel Hill & London.

This is one of hundreds of such excerpts contained; if you enjoy history, and quiltmaking, you'll love this book. I plan to reread mine, and be inspired, all over again!

Life is Good!

13 March, 2014

Unmoved!

This Lenten cross was erected outside the front doors of our church last Wednesday, Ash Wednesday, and will remain there throughout Lent until Easter Sunday. Wind has been problematic in the past, toppling the cross and damaging it to the point where a new one became necessary this year. My husband did some measuring, made some calculations, and came up with this cross and base system (steel plate in the base and a substantial length of steel pipe extending up into the cross itself) that he felt confident would stand tall and strong, even in the face of significant wind gusts. Last evening the cross was definitely put to the test! We drove to church to attend our mid-week Lenten service and parked our car near the sidewalk in front (where I snapped this photo) just as one of the hardiest wind gusts I have ever felt buffeted the car we were still seated in; the car was, momentarily, lifted a bit. That's no exaggeration! While this occurred I kept my eye on the cross... not a wobble, not even the tiniest tremor was detectable from the cross, it held strong. We looked at each other then, both were a little rattled and shaky after that experience, and yet the cross stood fast... unmoved.  So be it!
Life is Good!