Showing posts with label barn. Show all posts

28 August, 2017

Back To School...

...back to blog*. Where I live today is the first day of school again for public school. For all intents and purposes this day signals the end of summer. I have written about this before, but this day, that of school beginning once again, has always made me incredibly sad. I don't know where this emotion comes from-- does it have its roots in my own end of summer/ school starting memories? Does it emanate from sending my own little ones off to school again at the conclusion of happy summer vacations all those years ago? Is it a combination of both? Is it one more tangible marker of the passing of time?  It probably seems silly to most; this melancholy will pass, it does every year, but today's the day and my heart is heavy. As a way of mediating this "funk" I am choosing to focus on a positive outcome of today's first school day: once again my great group of sewing buddies, the "Miss Bee Haven" gals, have come through and piled up the nap blankets for PreK students at a local school. We have adopted a school and provide forty five blankets, three classrooms full, for the youngest students to claim and keep, not only at school, but forever when summer comes rolling around once again in 2018. I can only imagine their apprehension today-- embarking on new experience in a place where they've never been before, filled with faces of friends they've yet to meet. Then, a grace moment: they are given the opportunity to claim a blanket; something they can hold on to, wrap up in and feel safe, something that is theirs and theirs alone. I hope they can feel the love stitched in each and every one. 💗
Our "Bee" group gathered on Saturday at the barn studio of one of our members to have a Sew Day and pot luck lunch together, it was a gorgeous day. This has become an annual event and is yet one more end-of-summer signal for yours truly. As always, a good time was had by all and we'll all be marking our calendars for next year!
Life is Good!

* I have been woefully neglectful of this blog. I know-- you probably think that I have been consumed with cleaning after that last post over three weeks ago. No, I honestly can't say what has taken up my time or can even effectively explain my absence. I have been busy with many fun things and am making a concerted effort, starting today, to catch up and post again on a much more regular basis.

30 July, 2016

The Build-A-Barn Book Goes To...

...lucky commenter #2; Ka Holly, it is you! 
Congratulations to KaHolly, you were the second commenter on this week's blog post: "A Barn Is Born"; two was the lucky number this time! Julie will be sending you an autographed copy of the book so that you can make your own barn right away! Thanks to everyone who entered the giveaway, and thanks to Julie who wrote one fantastic book and is so generous with it, this was fun; please do look for Julie's book at a quilt shop near you.  Every time I type Build-A-Barn I think of something humorous; don't confuse this book with those workshops at shopping malls with a similar name.
Let me tell you a funny story. We lived overseas from 1996 until 1999; things appeared stateside during that time that I had no knowledge of until after I returned home, one of those things is the above mentioned mall store. Someone recommended the store to me and encouraged me to visit it when I shopped at my hometown mall again. I thought I heard them recommend a store by the name of "Bill Debair", in my mind I figured this to be a designer-- like Ralph Lauren. I went to the mall one day and looked high and low for the "designer" store: Bill Debair. I finally had to ask a fellow shopper. They directed me to the store with the huge logo as pictured above. Oh.

So, go--Build-A-Barn! Not Bill Debarn. I believe I will build a farmhouse next, my barn needs one.

Life is Good!

25 July, 2016

A Barn Is Born

"Harvest Barn" ~ 21" X 34"

Welcome to the barn! At long last, the Harvest Barn is a reality. Hatched from my imagination, and sketched on paper back in 1993, this barn of my dreams exists today thanks to no-pattern construction outlined and followed, step by step, straight from Julie Sefton's Build-A-Barn book. Click here for the back-story, a previous post. You can have your own barn too: if you can dream it, you can build it! Let me share my progress, through photos, to give you a glimpse of the process. At the end of today's post you will have the opportunity to win a copy of Julie's fantastic Build-A-Barn book.
Working from my sketch, the first thing that I did was go to the stash and pull fabrics that I thought might work for the various elements: sky, ground, barn, windows, doors. I labeled my selections.
Following the directions in the book I made a section of scrappy ground strata; I wanted lots of oranges to depict an overall image of fall leaves strewn among an abundant pumpkin patch. From the ground a barn structure began to emerge. 
My original plan was to applique the "X" door braces but I changed my mind. Using Julie's method I inserted strips for the cross-timbering, I love the results; I also decided to add a spit-rail fence to the left using an easy step-by-step approach as outlined within the pages. 
From that point on it was all details. The originally selected sky fabric proved too vibrant, at least it did to my eye, (lower left in the photo above) but the reverse side of that same fabric worked perfectly (lower right). And so, the sky fabric was used on the WRONG SIDE; which seemed just right to me! I found a very old piece of fabric in the closet which contained enough pumpkins of exactly the correct size and scale (or so I thought) to pull the piece together. 
Using fusible web and sharp, tiny scissors I loaded the barn scene up with pumpkins galore; pinning the elements in place on the design wall before pressing them into place. I left it there a while to ponder and change things around as I saw fit. Mr. Goodneedle walked by and after only a quick glance suggested removing the three gargantuan pumpkins as well as taking everything away from the front of the barn doors. "No self-respecting farmer would ever pile things in front of a door that's being used." Right.
I shifted a few things around just so. Then, the machine applique began-- the tree, the sign, the weather vane and the bumper crop of pumpkins! Oh, I almost forgot-- a few bushels of apples too.
Harvest Barn: quilted and ready for binding. Can't you just hear the excited squeals of every preschooler who's ever visited a pumpkin patch in October?

As the binding was applied I was able to sit quietly with my barn and reflect. I am SEW excited to report that I couldn't have been one bit happier with the results of this project. Working from my own mind with the benefit of tried and true techniques from the book I was able to complete my very own twenty three year old dream barn in a way that far exceeded my wildest dream. Are you ready to Build-A Barn of your own?

Leave a comment on this blog post for a chance to be entered in a giveaway to win an autographed copy of Julie Sefton's book.  Be sure that as a commenter you're able to be reached via e-mail. If we can't contact you we won't know where to send the book. That would be sad. A winner will be selected on Saturday, July 30. If you're not the lucky recipient, fear not: Julie's book is available via the link above as well as bookstores and through your local quilt shop. If you can't find it, ask; they can get it for you!
Life is Good!

21 April, 2016

Once Upon A Barn

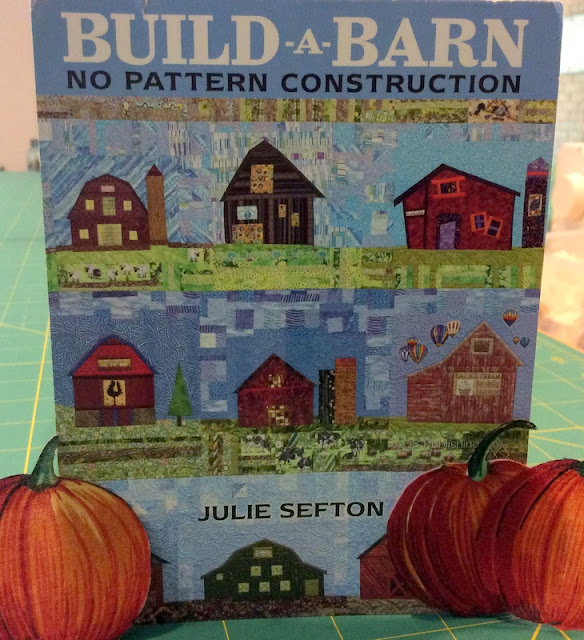
You may have noticed the Build-A-Barn button on the side bar of my blog, if you don't know what that is I am here to tell you today. The uber-talented quiltmaker extraordinaire, Julie Sefton, has written a book! You may know her better as quiltdivajulie  she has an exceptional blog: "Me and My Quilts-- Exploring the Possibilities". Julie is extremely creative and super organized at the same time; traitst one might think are exclusive of each other, they're not in Julie's case! Julie is always sharing her creative process through her blog posts. Step by step, post after post, she shares her inspirations, her thoughts, her notes and her unique quiltmaking successes as well as those things that didn't quite work out as well as she had imagined; she is most generous in every regard. I only know Julie through blogging. Over a year ago she contacted me, as well as a few others, about helping to proof the process notes for this book. From there the SSOBB was born; there's a link for the Secret Society of Barn Builders on my sidebar too; you can read more about this "sorority" there. So, fast forward to now. The book is out and available, it is published by AQS; if you can't find it in your LQS you can order it directly (but tell your LQS that they really should carry it!). My copy arrived a few weeks ago, as soon as I had it in my hands I read through each word of each page, it was exactly like visiting with Julie through her blog, I was immersed in each and every step of her pattern-free, improvisational barn building techniques. Suddenly I had a thought! I had a barn drawing that I could pull out from a long-ago quilt class; I could use Julie's technique and make a 2016 version of my 1993 class sketch!

I had no problem finding my notes and sketches from that class that I taught twenty three years ago! But, where are the sample blocks that I constructed way back then? I have no idea. That's okay-- my mind is racing and I am launching on a new adventure, using a new method, through this inspiration on aging, yellowed paper!
With my sketch in hand and Julie's book opened wide I have begun to pull fabrics to bring the old barn to life!
Join me in this adventure. I will share my progress along the way. I have enlarged my original drawings so that I could envision a central panel in actual size, approximately 24" X 12". Stay tuned for updates, this is going to be fun! Thank you, quiltdivajulie, for inspiring me in oh-so-many ways; let's see what happens along this path!
Life is Good!