Showing posts with label tips and tricks. Show all posts

13 March, 2024

Checking 'Em Off...

...one at a time, from the "projects to finish" list. "Winter Winds"* is now ready for hand finishing! ✔ I used the Swirly Snowflakes pantograph for this one, it might just be my new favorite panto; it's FUN to quilt, it was just perfect for this one too! I got the binding and the hanging sleeve made as soon as I removed it from the rails so that I would be motivated to complete it 100% without delay. I use the glue basting technique at the ironing board before I attach my binding by machine.  I've been doing this for years and have always been happy with the results. You can watch Sharon Shamber's video by clicking on the embedded link above. It's wonderful to have no pins whatsoever to contend with!
The only difficulty that I had with glue basting my binding was that someone was inconvenienced whenever I had to move his bed down below as I worked my way around! Sorry, Augie.
Quilted, bound, hanging sleeve and label all attached and ready for hand stitching. 
This is the hemmed edge of the hanging sleeve before it was attached. I turned the edges in 1/8", finger pressed, and turned it again, at less than 1/4" inch and stitched it down. Don't those edges look straight and crisp? I used a new tool, keep reading...
Clover's Fabric Folding Pen. When I was getting ready to make the sleeve I remembered this, it had been a Christmas gift that I put in my notions bin to try later. No time like the present, right? I read the instructions and gave it a try. I was amazed. As I drew the pen onto the fabric along a straight edge it made a moist line. I folded it along that line and, like magic, it behaved perfectly... straight, crisp fold! I did press it with the iron too, but I probably didn't need to. This is a great tool to have on hand! Clover NEVER disappoints! 
Another tip: if you have access to a serger, do yourself a huge favor and finish your quilt top's edges before loading your quilt for quilting. This is the second time that I've done this and I can't believe how it has improved my life! Edges are secured and stabilized as they're over-edged and your top will lie smooth and square on the quilt sandwich throughout the entire quilting, and advancing, process. Plus, it is so NEAT!
One more check ✔: working my way through last year's BOM, I knocked out block #7; this block is entitled "Hopeful". I am that, hopeful, that I'll get more of these stitched up on Saturday; it is National Quilting Day after all. Can you think of any better activity to commemorate the occasion?
Life is Good!

*The snowflake pattern shown above is called Stars and Snowflakes by Wendy Sheppard.

29 August, 2022

That's Cool

Don't you just love it when you find that one tool that works for a myriad of tasks, and works so well! I don't know how I ever got along before the handy-dandy Folded Corner Clipper took up residence in my sewing room but I can tell you this: I'm not looking back. I use mine, literally, all the time! If you don't have this tool, you need one. (Click on the link above to check it out, there are YouTube videos as well.) Anyway, I had binding strips cut for my WonderCurve Butterflies table runner. I had a bunch of strips, too, because I was using up a matching scrap. I carefully stacked those strips one on top of each other, all right sides up,  grabbed that FCC* and placed it as shown, trimmed off the excess and placed them right sides together for joining at the perfect 1/4". No dog ears. Perfection! 
Binding is all joined, attached, basted and ready for hand finishing. What did I use for marking that perfect miter as I turned and pressed the corners while applying the binding? The FCC, of course! That is cool, but do you know what's even cooler?
This refrigerator! Yay!! Mr. G. ordered parts and worked all afternoon yesterday to get it running again!
We're back in business here in the kitchen; the milk, eggs and butter have all been reinstalled.
Finger crossed that it will last a year. 
Life is Good!

* FCC - Folded Corner Clipper

20 May, 2020

My Home State

I loaded this panel onto Snowbird last week to do some bead board, straight-line, quilting. I decided to use the panel as is, it measures 19" X 44" and is perfect, without being bordered, as a table runner for our kitchen table. I had it quilted up in no time.
One of the very best tips that I've ever heard is one that I learned from quiltdivajulie. She makes her bindings before she's quilted her pieces so that they're ready to go when the quilt is trimmed and needs finishing. For me, this is a psychological trick-- it takes no less time to have it made and ready ahead of time, but it is such a efficient way to work. My mind doesn't want to stop and make binding after quilting and trimming; but, I have no trouble loading a quilt, preparing the binding, and then setting about the quilting. When the trimming is finished, the binding is applied right then and there; this is helpful to me and seems like the most productive way to work.
Speaking of efficiency-- actually, I quilted two at the same time. The New Hampshire panel is a gift for my mother. Shhhh-- don't breathe a word if you're reading this and know her, she'll be surprised!
This was done and on the table by last evening. These panels, My Home State, are by Northcott. Mine was a gift from Quiltkeemosabe, check at your LQS for the state of your choice.
Mr. G and I play Cribbage every day, if you're familiar with the game you'll understand the smile on his face-- he had four 5's dealt to him and a Queen turned; this hand is worth 28 points! He had trouble not laughing as we played out the hand, he knew that this experience is very rare and lucky!

Life is Good!

17 October, 2019

Hello, Pouch!

I bought the pattern for the "Hello Pouches" (knot and thread design) and was eager to make some up, I thought that they were cute, functional and a nice alternative to the paper gift bag for small Christmas gifts. I made one up yesterday as a trial. I'm happy to report that it's a well-written pattern with easy to follow instructions and access to online video tutorials. I made the "large" size (7.5" X 6.75" X 4.25") only because that's how much clear vinyl I happened to have in the house. I learned a few things along the way, if you want to make some let me pass along these tips:
Use a "Jeans" needle. The one that I used was 100/16. There are lots of bulky bound seams to sew through and the heavier needle is most valuable here, sew slowly too! I love Wonder Tape and I used a good bit of it on this bag.
As you can see in this photograph there are narrow, turned, top-stitched bindings; the Wonder Tape, when applied along the folded edge before turning, ensures those narrow hems will remain straight and smooth. I have not had any problems with the product gumming up my needle, it delivers nice results. Every bit of this bag has finished, bound edges, even along the zipper tape; those straight, flat hems are pretty and I can't get results like that when I use pins and am stopping and starting to remove them. Since the bag is see-through (the beauty of the pouch to begin with!) you want your finished seams to look extra-nice.
The zipper is made from one half of a handbag zipper-- the two sides are separated, the pull removed, and then threaded back on both ends of the zipper tape which has been folded in half. One thirty inch, double slide, zipper will make two bags. There's a trick to finessing the pull back on, (and a video that I watched three times!) that takes a bit of practice, but I got it. I added a fabric tie and attached it to the zipper pull to make opening easier. All in all, this is a nice bag and I will make more;  I can see lots of practical uses for this one. One down; a bunch to go!! 

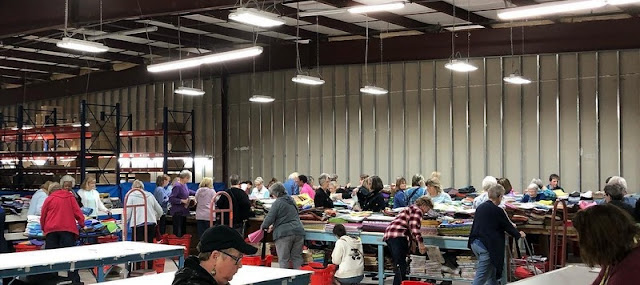
And just in case you thought that I was running out of projects(!), I made a quick trip with friends to the Pineapple Warehouse sale today; they were selling fabric by the POUND, it is a great deal!
Warehouse shopping going on-- fabric by the pound!
I ended up bringing home lots of pieces (pounds!!) for quilt backs as well as this fabric for these two quilts (below)-- a table topper for Christmas and a wall quilt for our youngest granddaughter for her birthday next January (backings on the bottom of the stacks). These will be projects to keep me busy at two upcoming retreats scheduled for next month--perfect timing! I hope your day is a pieceful one!

Life is Good!

04 August, 2018

I Get By...

...with a little help from my friends. This post contains a few quick, clever tips that I have learned recently from my friends. These are those kind of super smart tips that resonate immediately; at least for me, with a "why didn't I think of that" sort of reaction.  The first tip is for cutting WOF strips (or any strips, really) where you will be using a long ruler. As we have all learned, the ruler is placed in position and held in place by your hand; once you begin rotary cutting you "walk" your hand up the ruler as you cut, spider-style, until you cut clear through the end opposite where you began. A few weeks back I hosted a nap-blanket workshop here. During the course of the evening one of my friends asked if I had a dumb-bell style hand weight. I did. She immediately placed it on the end of the ruler that was in position and cut, cleanly, in one swift motion without moving her hand. Perfection! My weight happens to have flat sides which makes it even better. I am thrilled to have re-purposed this piece of exercise equipment into something extremely useful, it now resides in my ruler drawer!
The second tip, from another friend, has to do with cookies. Fresh-out-of-the-oven-whenever-you-choose type of cookies. One of the reasons that I rarely bake chocolate chip cookies anymore (unless the grandchildren are visiting) is that we don't need batches of cookies sitting around, just for the two of us. (My husband would disagree with this logic, he certainly does his part to keep inventory down). But, he would agree, that the cookies are always best when they are just out of the oven. Now, because I paid attention to my friend's suggestion, I mix up a full batch of chocolate chip cookie dough and scoop it all onto a parchment-lined baking sheet. Then I stick it into the freezer for several hours until each "cookie" is frozen through. Clean up is done all at once and I don't have to think about that again. 
From there, the "cookies" are placed into a plastic bag (I place that into an additional freezer container) to remain in the freezer until needed. From this point, whenever that cookie-urge strikes, or guests drop by,  you can bake as many or as few as you choose right then and there.
No muss, no fuss! Yum; pour the milk! 
Now, don't you feel smarter? I know that I do, thanks to my friends!
Life is Good!

08 December, 2013

"Look Ma, No Pins"!


Meet my newest time-saving sewing assistant; yep, it's Elmer's school glue!  I saw an online tutorial using school glue instead of pins for attaching binding to a quilt in preparation for stitching. You're probably shaking your head in disbelief, I did too; at first, but the more I read the more interested I became in trying out the technique. I had everythig I needed on hand, including a quilt just waiting to be bound.

Place your to-be-bound quilt on the ironing board and apply glue dots as shown in photograph above. I only attached a few inches at a time.


After matching up the raw edges of the binding along the quilt edge on top of the glue dots press it with a hot, dry iron to set the glue. Don't  use steam! This glue is completely washable, so much so that even one burst of steam will absolutely dissolve the glue without so much as a trace remaining, believe me.


Work your way around the quilt, including the corners (as shown) gluing and pressing as you go.

It was a joyful sight to observe the attached binding, all around the edges, as the quilt dropped off the ironing board and to the floor; the binding didn't budge!

The next step was to move the quilt to the cutting table and mark my stitching line, 1/4" from the edge. I always do this, it was a snap to mark without the bulk of pins beneath! I find the stitching line helpful because I always use a walking foot to stitch down my bindings and can't judge the seam allowance well enough with that foot attached, the line is one extra insurance step toward accuracy.

Stitching down the binding was smooth sailing all the way, the glue never got hard; it was soft and pliable, plus it held firmly, the entire time!  A word of caution: make sure that you use WASHABLE School Glue. The components of this glue guarantee a complete and clean wash out. The link for the tutorial I saw is here. I happened to have the clear school glue (leftover from the sparkle bottle) but the white school glue seems to work the same way, both dry clear.

There you go, tried and true!
Life is Good!